
Gun safes might not be as “safe” as you think, especially when you don’t hold up your end of the bargain. Being out of sight and out of mind until next season is often a recipe for headache and heartache if you don’t take the right steps to give your firearms the treatment they deserve.
While hunting season is over for most of us, you’ve got a few key steps to take if you want your firearms looking great and operating in tip-top shape the next time you pull them out. It’s an inconvenient truth - maintaining firearms for lifelong enjoyment requires a bit more attention than running the occasional patch down the barrel and a light oiling.
Even if you’ve never fully stripped down a firearm…the complete end-of-season cleaning process is not nearly as time-consuming or difficult as you think…and there’s other benefits to becoming familiar with the procedure.
We’re going to do a deep dive into this overlooked aspect of firearm ownership, especially for hunters who bring their guns into some of the harshest conditions.
And these principles not only apply to shotguns, but any firearm you want to keep running flawlessly and rust-free year after year.
Why the Deep Clean?
If you spend much time in the field, you’re going to expose your firearms to hazardous situations. Rain, dust, dirt, and snow are just a few of the obvious ones that can wreak havoc on metal and moving parts. Mix in some hot shooting and dogs that like to shake off in the worst possible spots and you might have a gun that looks like it crawled out of a mud wrestling contest.

This is where a lot of us go wrong…we only tend to clean out the bore and lubricate all the obvious exterior parts, such as barrels, receivers, and magazine tubes. Even if you haven’t subjected your firearms to extreme use and abuse, you’ve likely got a handful of parts and places that need to be cleaned before you store them away for the next several months.
If you’ve never done a full disassembly, there are several reasons why this is critical.
Besides the benefit of knowing your firearms are ready for next season, your understanding of how they function and operate increases dramatically. And it ensures your kids don’t inherit a rust bucket they’re embarrassed to bring to the range.
While it may seem intimidating at first, the full takedown process is probably easier than you think. Do it a couple of times and odds are the process becomes second nature. This is particularly valuable for the times when you’ll encounter mechanical issues in the field - by having a deeper knowledge of how all the moving parts interact, you’ll be able to identify and solve problems quickly and easily.
While we’re on the topic of bad things that happen in the field…keep in mind Murphy’s Law seems especially fond of firearms. Maybe you get caught in a downpour and lose your footing - it’s practically a guarantee there will be a mud puddle, dirt mound, or snow bank for your firearm to fall into. You might even be one of the unlucky few to completely submerge a firearm in a creek, pond, or other water source.
You’re gonna need more than a clean barrel and quick wipedown in those situations.
What You’ll Need
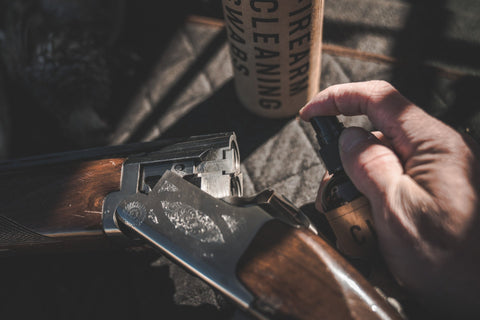
There’s a good chance you’ve already got most of the necessary tools. And if you want to give your firearms the spa treatment and make it quicker and easier, we’ve got just about all the essentials to build the perfect kit. Load all of this into a Sage & Braker cleaning mat and you’ve got an organized system and a place to work anywhere. Here’s what you’ll want to have on hand:
- Firearm specific tools (bits, choke wrenches, punches, etc.)
- CLP
- Firearm Grease
- Parts Tray
- Bore Cleaning Kit
- Brush & Pick Kit
- Gun Cleaning Cloths
- Firearm Pipe Cleaners & Cleaning Swabs
Disassembly of Your Firearm
It goes without saying, but make sure the firearm is unloaded. If you’ve got a magazine tube, double-check that as well.
Before you start separating parts, have a plan in place. Maintain a clear and clean workspace. This is where our gun cleaning mat and small parts tray are invaluable. The last thing you want to do is lose key parts because they fell and vanished into the jungle of a dirty garage floor. Pins, ejectors, and small springs are especially notorious for vanishing without a trace.
Depending on the type of firearm, this process will look a bit different. For the sake of clarity, let’s say we are disassembling and stripping the gun down as far as the owner’s manual allows. No excuses if you don’t have your manual either - you’re only a minute or two away from having a digital version on your phone with a quick Google search.
This will get you to a key point where you’ve separated the main parts of the firearm including the barrel, receiver, and forend. For pumps and autoloaders, you’ve now got a chance to remove critical parts such as trigger assemblies, bolts, springs, and rails. This will give you easy access to the inside of the receiver…and if you haven’t been there in a while (or ever), you might be surprised how filthy it gets.
The Process
So you’ve got your main components separated and individual parts safely stored in the small parts tray. Start by spraying a liberal amount of CLP in both ends of the barrel so the entire inside is coated. If you’ve got a double barrel, do this with both barrels. While you’re at it, spray the receiver with CLP as well. For wood stocks and forends, move those aside if possible or at least avoid spraying with CLP.

Give the small metal parts in the tray a healthy soak in CLP. You’ll want to allow 10-15 minutes for the CLP to work its magic - this gives it time to penetrate and loosen carbon, copper, and lead fouling. For parts that may not be all metal, such as trigger assemblies, set those aside.
When the CLP has been given sufficient time, you’ll want to grab gun cleaning cloths, brushes, and picks. For small parts that may not be as dirty, such as pins, bolt handles, and exterior surfaces, simply wiping the excess CLP will leave it clean and lubricated. With some parts exposed to frequent buildup (ejectors, bolts, etc.) you’ll want to wipe them with a gun cleaning cloth and use a nylon brush to loosen and remove stubborn deposits. For pesky areas that are tough to reach, such as corners or interior edges, a brass brush or pick are perfect for heavy duty cleaning without damaging surfaces.
If you’ve got a full trigger assembly separated, use CLP to clean and lubricate any metal parts, being careful not to leave an excessive amount behind. It’s not uncommon for people to claim they got a bad box of shells when in reality they have buildup in their trigger assembly. Take a particularly close look at the hammer and make sure there is no debris that could affect those moving parts.
When you’re done with the brushes, you’ll want to grab some bristle pipe cleaners and cleaning swabs to remove the grime. These are perfect for getting into the nooks and crannies and extracting any buildup that could eventually affect the function of the firearm. This is especially true for receivers, which often end up housing all sorts of debris and fouling inside.
Now that the CLP has had a chance to break down the fouling in the bore, it’s time to finish the job. Few things are more satisfying than a flawless, shiny bore, and here’s the good news - getting your bore spitshine clean is easy with our bore cleaning kits.
Simply choose the appropriately sized kit and since this is a full clean, you’ll want to use the whole system incorporating the brush and buffing rope. This allows the brush to dislodge any stubborn fouling and the rope to clean and buff the entire barrel. For other times when you only want to use the brush or just buff the barrel, these kits easily separate so it’s truly dual purpose.
Putting it All Together
The finish line is in sight - you’ve got all your parts cleaned and organized. Now is the time to verify you’ve removed excess CLP and fouling from individual parts. If you’re cleaning a shotgun with interchangeable chokes, use your choke wrench to remove the choke from the barrel and clean it with CLP. Do not remove your choke before cleaning the barrel as this will force buildup into the threads at the end of the barrel. When you’ve got the choke tube clean, use a cleaning swab to apply a small amount of firearm grease to the threads. This prevents the choke from seizing to the barrel, especially if you tend to leave the same choke in all season.
You’ll want to give the small parts, receiver, and exterior metal surfaces a light spray or wipe with CLP to prevent any rust or corrosion during storage. Depending on your specific reassembly process, you may want to do this before putting the firearm back together, or once it is mostly reassembled. Again, it’s best to consult your manual and follow the manufacturer’s directions, but typically it’s very simple.
That’s all there is to it - you’ve now got a firearm that’s ready for the next adventure, which is hopefully sooner rather than later. No more wondering if there was any moisture left inside or grime caked up in the worst possible spots.
Best of all, you’ve got peace of mind you’ll be ready when next season rolls around.