
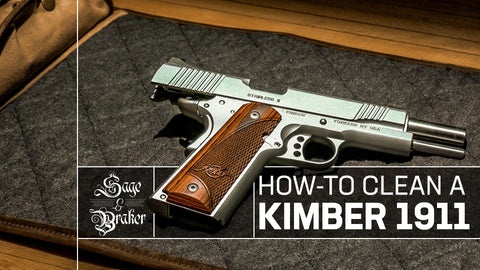
A step by step video on how to clean and disassemble your Kimber 1911 Custom II handgun.
Recommended Gun Cleaning Supplies for Your Gun Cleaning Kit
Step by Step on How to Break Down and Clean Your Kimber 1911 for Beginners
Step One
First and as always when cleaning your firearms, make sure they are not loaded and that the magazine is out.

Step Two
You are going to want to use the bushing wrench provided by Kimber in order to turn the barrel bushing clockwise.

Careful now! You only want to turn it as much as you need to to catch the edge of the recoil spring plug as shown here. If you overturn it the plug could go flying as well as the spring. Take your time and keep it pointed away from your face.

Push the recoil spring plug down with your thumb and twist the barrel bushing the rest of the way while keeping pressure on the plug and spring.
Step Three
Now slowly release the spring pressure and remove the recoil spring plug and the recoil spring.

Notice that the flat end of the spring will be towards the back of the gun, you will want to remember that for re-assembly.
Step Four
Push the slide back until the disassembly notch lines up here on the slide stop.

You can now pop the slide stop out with your thumb by pushing the slide lock pin from the other side.
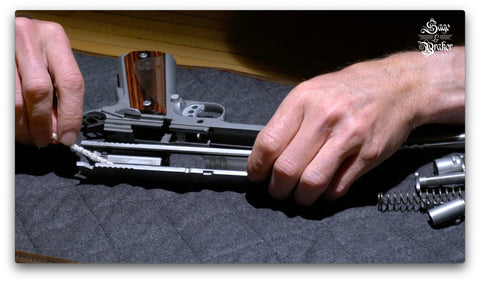
Step Five
You are now able to remove the slide from the frame.

Now remove the guide rod.

Step Six
Rotate the barrel bushing until you can pull it free.

Step Seven
Push the barrel link forward. You can now remove the barrel from the slide.

You have all the major parts disassembled and ready for a basic cleaning.
Step Eight
Give all metal parts and the bore a light squirt with some Sage & Braker CLP.

Step Nine
Using our brush and pick set, we are going to scrub all contaminated areas with a brush.

If there is any heavily gunked up areas use our pick in order to break it free. Don’t worry, the pick portion is made of a soft brass so it won’t scratch your firearms.
Step Ten
Next we’ll use some of our bristle pipe cleaners for further cleaning. Sage & Braker’s bristle pipe cleaners use a stiff plastic to help break up carbon while the cotton portion mops it up. You can bend them as necessary to get to all the hard to reach areas.
Step Eleven
We’ll finish it up with some cotton swabs in order to make sure the carbon and other contaminants are free and clear.

Really concentrate on the moving parts where the frame and the slide come into contact. Any grit left behind can cause unnecessary wear and tear on your gun.
Step Twelve
Now it’s time to grab a bore cleaning kit meant for your caliber, we’re talking about a 1911 here, so a .45 cal is what you’ll want. There are 1911's chambered in 9mm as well so if that is your guns caliber use a bore cleaning kit of that caliber.

Run it through the bore like so. Start at the breach end of the barrel and pull it threw the muzzle end.
You could do this as well for a quick cleaning while the gun is assembled, but it works just as well for a deeper cleaning when disassembled as shown here.
Step Thirteen
Now a final wipe down with a rag.

Step Fourteen
Apply a light coating of our CLP on the internal working parts to keep the gun lubricated and you will be ready to reassemble your Kimber 1911.

Step Fifteen
Take the barrel making sure that the barrel link is pushed forward and insert it back into the slide.

Step Sixteen
Replace the guide rod making sure that the concave side of the guide rod head is towards the barrel. It’s less complex than it sounds, have a look at it and it will make sense.

Step Seventeen
Take the barrel bushing and reinsert it over the barrel as shown and then spin it clockwise to lock it into place.

Step Eighteen
You’ll want to make sure that the barrel link is pointed up like this before reassembling the slide and frame together.

Step Nineteen
Now insert the frame onto the slide like this. Keep pushing the slide back until you can see the barrel link through the hole.


At this point you can push the slide lock back in the hole.

Step Twenty
Continue to push the slide back until the disassembly notch aligns right like this.

You can now turn the slide stop into place.
You can put the safety on in order to prevent the slide from moving back, making it easier for this next step.
Step Twentyone
Grab the spring and insert it over the guide rod remembering that the flat end of the spring goes in first.
Step Twentytwo
Insert the recoil spring plug overtop of the spring.
Press it down with your thumb and twist the barrel bushing until it catches on the outer edge of the recoil spring plug.

Step Twentythree
Take the bushing wrench provided by Kimber and twist the barrel bushing counter-clockwise until it is seated correctly.

And there you have it, a cleaned and lubricated Kimber 1911.