
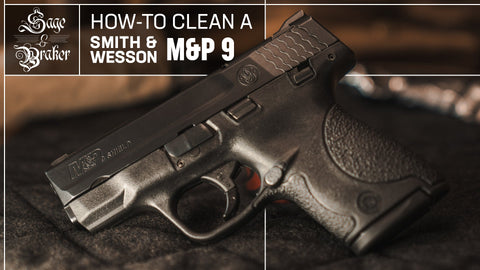
Whether you carry your Smith & Wesson M&P Shield 9mm every day or keep it ready for the range, regular cleaning is essential for maintaining reliability and performance. In this step-by-step video, we walk you through the complete process of safely field stripping, cleaning, lubricating, and reassembling the M&P Shield 9mm using proper firearm maintenance techniques.
You'll learn how to disassemble the pistol, clean carbon and fouling from critical components, apply lubrication where it's needed, and inspect the firearm before reassembly. This guide is designed for both new and experienced firearm owners who want to keep their M&P Shield running reliably for years to come.
At Sage & Braker, we believe proper firearm maintenance should be straightforward and effective. Our goal is to provide practical, educational resources that help firearm owners confidently care for their equipment while using quality cleaning products and proven techniques.
Watch the video above, and explore our growing library of firearm cleaning tutorials covering rifles, shotguns, and handguns.
Products Used: The Complete Handgun Care Kit
How to Field Strip and Clean a Smith & Wesson M&P Shield 9mm
Keeping your Smith & Wesson M&P Shield 9mm clean is one of the easiest ways to ensure reliable performance and extend the life of your firearm. Follow these steps to safely field strip, clean, lubricate, and reassemble your pistol.
Step 1: Verify the Firearm is Unloaded
Before beginning any maintenance, always make sure the firearm is unloaded.
- Remove the magazine.
- Lock the slide to the rear.
- Visually and physically inspect the chamber to verify there is no ammunition present.
Never begin cleaning until you have confirmed the firearm is unloaded.
Step 2: Gather Your Cleaning Supplies
Having everything within reach makes the cleaning process much easier.
Recommended supplies include:
- CLP (Clean, Lubricate & Protect)
- 9mm Bore Cleaning Kit
- Nylon cleaning brush & picks
- Gun cleaning swabs
- Microsuede cleaning cloth
- Firearm grease
- Parts tray
Step 3: Field Strip the M&P Shield
With the slide locked open:
- Rotate the takedown lever 90 degrees downward.
- Locate the yellow sear disconnect lever inside the magazine well.
- Using the factory frame tool (or a non-marring pick if yours is missing), carefully flip the yellow sear disconnect lever downward.
- Release the slide and remove it from the frame.
Unlike many striker-fired pistols, lowering the sear disconnect allows the slide to be removed without pulling the trigger.
Step 4: Remove the Barrel and Recoil Spring
With the slide removed:
- Compress the recoil spring slightly and lift it out.
- Remove the barrel from the slide.
- Place all components into a parts tray to keep everything organized.
Step 5: Apply CLP
Spray CLP generously onto all metal components, including:
- Slide
- Barrel
- Recoil spring
- Frame rails
- Other exposed metal surfaces
Apply CLP down the bore from the chamber end as well.
Allow the CLP to sit for several minutes so it can loosen carbon and fouling before scrubbing.
Tip: Avoid spraying directly into the firing pin channel inside the slide.
Step 6: Scrub Away Carbon
Using a nylon cleaning brush, scrub all metal surfaces to loosen carbon buildup.
Pay special attention to:
- Slide rails
- Breech face
- Barrel exterior
- Locking surfaces
- Feed ramp
For stubborn deposits, brass-tipped picks can help remove fouling without damaging the finish.
Step 7: Clean the Bore
Using your bore cleaning kit:
- Insert the bore cleaning kit from the chamber (breech) end.
Cleaning from the chamber end helps protect the muzzle crown.
Step 8: Clean Hard-to-Reach Areas
Use gun cleaning swabs to remove loosened carbon from tight spaces, including:
- Slide rail channels
- Frame rails
- Around the trigger components
- Other small recesses inside the frame and slide
Pointed swabs make reaching narrow areas much easier.
Step 9: Wipe Everything Clean
Use a quality microfiber cloth to wipe away any remaining CLP, carbon, and debris.
Paper towels can work in a pinch, but a durable cleaning cloth is less likely to leave lint behind.
Step 10: Lubricate the Wear Points
Although the remaining CLP provides light lubrication, applying a quality firearm grease to the primary wear surfaces offers better protection.
Apply a small amount of grease to:
- Slide rails
- Frame rails
- Barrel contact surfaces
- Other visible wear points where the finish has become polished from use
Spread the grease evenly using a cleaning swab or your finger.
Remember, a little grease goes a long way.
Step 11: Reassemble the Pistol
Reassembly is the reverse of disassembly.
- Install the barrel into the slide.
- Reinstall the recoil spring, seating it securely against the barrel lug.
- Align the slide with the frame rails.
- Rack the slide fully rearward and lock it open.
- Rotate the takedown lever back to its original position.
- Release the slide.
Step 12: Perform a Function Check
After reassembly:
- Rack the slide several times.
- Verify the slide cycles smoothly.
- Confirm the takedown lever is fully seated.
- Perform a basic function check according to the manufacturer's recommendations before loading the firearm.
With your Smith & Wesson M&P Shield 9mm cleaned, lubricated, and reassembled, it's ready for your next trip to the range or to return to everyday carry.